My Calendar
My Appointments
The My Appointments sub-tab allows users to check their weekly appointment schedule and view additional details of their client appointments, including checking in a client or moving/canceling the appointment (those steps can be found in the Manager & Staff Getting Started Guide).
On this page, users can also book appointments on behalf of clients by clicking an available slot.
My Schedule
The My Schedule tab allows users to add and keep track of their availability.
Creating Availability
- Navigate to My Calendar and select the My Schedule sub-tab.
- Click the New Availability button to add availability.
- Fill in the date, start time, and end time for when you’re available.
- Click Replicate to fill in times for when your availability is recurring. You will be prompted to fill out the days of the week and starting and ending dates and times.
- Check the box next to Drop in Appointments only, or select other appointment types (in-person only, remote only, or hybrid).
- Press Save.
The following video walks through the steps mentioned above.
Deleting Availability
You can either delete a single availability slot by clicking the “Delete” button in the upper right corner of the item you wish to delete. Alternatively, you can use the “Bulk Delete” button to delete more than one slot at a time.
Follow-up List
The Follow-Up List sub-tab is where a user can view or remove clients from their follow-up list. This page provides information about the client and when the follow-up ticket expires. Students on the list can be removed manually by clicking the “X” delete icon.
For more information, see “Follow-up Ticket” in the glossary.
Calendar Settings
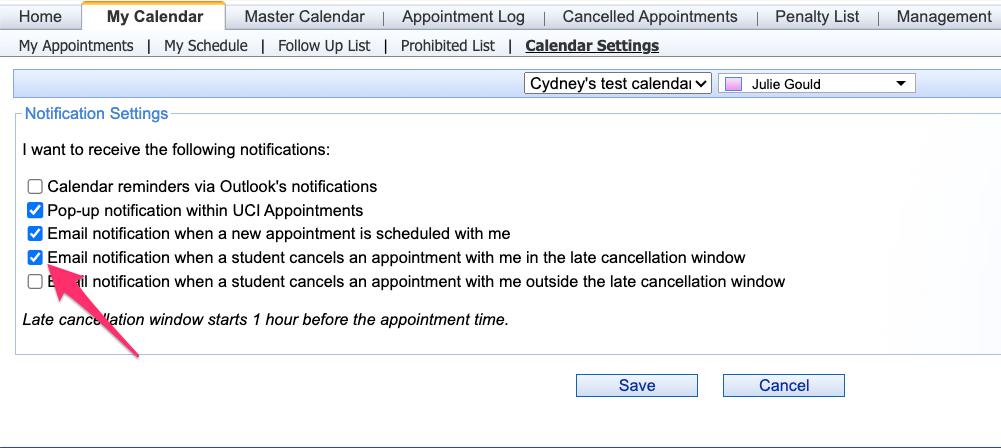
Staff can opt out of various notifications generated by UCI Appointments. This section covers how to opt out of receiving the email notification sent when an appointment is scheduled with you.
- Navigate to My Calendar.
- Select Calendar Settings.
- Uncheck any boxes under Notification Settings to opt out of receiving different notifications.
Note: You can opt-in or out of three different types of notifications on this screen. Note that if you are associated with multiple calendars, you can configure these opt-out settings independently for each calendar. - Press Save.