Setup & Settings
User Accounts
The User Accounts sub-tab is where managers add or remove users from Appointments. They can also toggle a user’s permissions between regular users, or managers. The only difference is that managers have additional access to the management tabs and functions.
Adding Users
- Click Add New User on the User Accounts sub-tab to add a new user.
- A search box will appear. Enter the name of the user you wish to add. You can use last name followed by an asterisk (*) to find anything that matches.
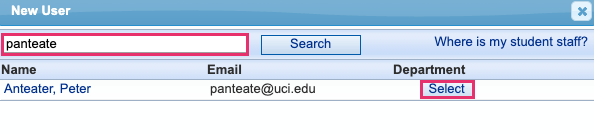
- Once you find the user you are looking for, press Select next to that user to bring up the edit user details window.
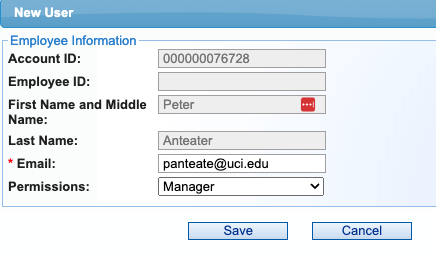
- For Permissions, choose either Manager or User.
Adding student staff
Only people entered into the UCI payroll system are able to be added as users to Appointments. If your student staff are recently hired and do not yet have an employee ID in UCI’s system, they will not appear in the search and cannot be added as office staff in Appointments. It can take several days for a newly hired student’s employee status to be reflected. Please reach out to your HR contact for questions around the hiring process and its timeline.
This limitation that office staff must be employees is a FERPA policy consideration. If you have a special circumstance where you believe someone without an employee ID should be a user in Appointments, or if you have other questions, please contact us at appointments-support@uci.edu.
Editing Users
- Click Edit User next to the corresponding user to edit that user’s record.
Note: The only editable attributes are the user’s email address and permission level.
- Edit user details in the edit user details window.
- Press Save.
Deleting Users
Use the “Delete” button next to the corresponding user to remove that user from Appointments. The user will no longer have access to the system.

Note: Remove the user calendar first for users who also had calendars (i.e. appointments could be booked with this person).
Deleting users who had Appointments calendars
- Ensure there are no future appointments on any of the user’s calendars. You can do this using the “Future Appointments” report. If there are future appointments scheduled, you will need to move those appointments to another advisor’s calendar, or cancel the appointments and notify the clients.
- Delete any calendar(s) owned by the user.
- Click Delete next to the corresponding user to remove them.
- A pop-up will appear asking you to confirm. Click OK to delete the user.
Master Calendars & Groups
The Master Calendars & Groups sub-tab is where managers add, edit, or remove master calendars from Appointments.
Adding/Editing a Master Calendar
- On the Master Calendars & Groups sub-tab, click Add New Master Calendar to add a calendar. Click Edit next to an existing calendar to edit it.
- Input/change your master calendar details (name, week start, appointment cutoff, etc.).
- Press Save.
The following video walks through the steps mentioned above.
User Calendars
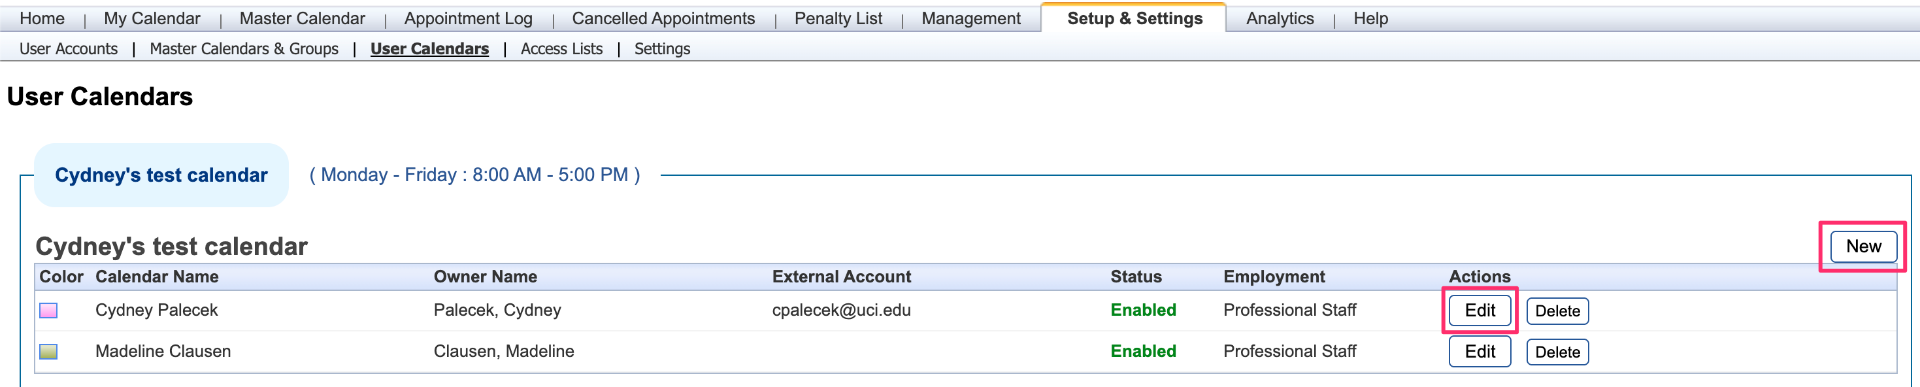
The User Calendars sub-tab displays Master Calendars and associated user calendars listed inside it by Appointment User and calendar color.
Adding/Editing a User Calendar
- On the User Calendars sub-tab, click New to add a new user calendar.
- To edit an existing calendar, click Edit next to the corresponding user calendar.
- Fill out the details of the calendar information.
- Owner: associate user via dropdown, which will auto-populate in the Calendar Name field.
- Office 365 email address: the entered email address must be associated with an Outlook calendar for syncing to work properly. If the person primarily uses Gmail, their Outlook address may be in the format UCInetID@exchange.uci.edu.
- Information for visitors: enter details for the client (e.g., a personal Zoom meeting room).
- Specify calendar details (select a color and calendar group)
- Status: Enable or disable the calendar.
- Employment: select Professional Staff or Student Staff.
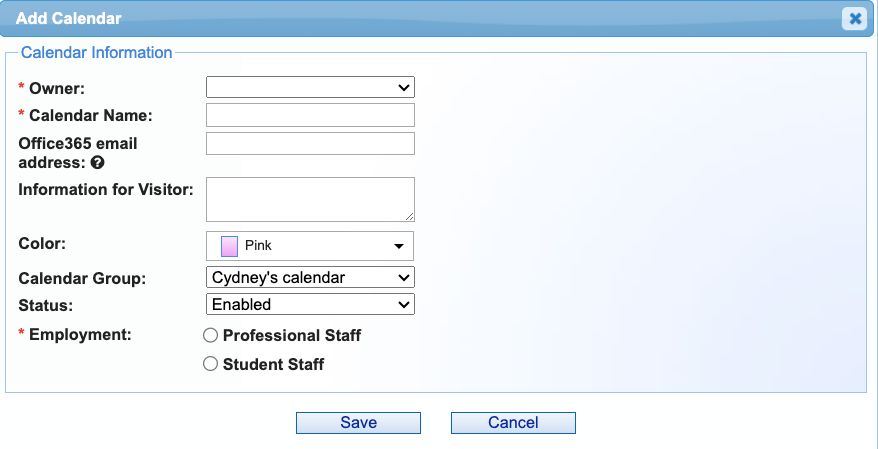
- Press Save to save changes.
Access Lists
The Access Lists sub-tab is where a manager can add or remove access lists, or modify the access list ranking and settings in Appointments. Access lists can have a custom member source list via a CSV upload or the custom criteria offered.
Adding/Editing an Access List
- On the Access Lists sub-tab, click New to add a list.
- To edit an existing list, click Edit next to the corresponding access list or click the list name.
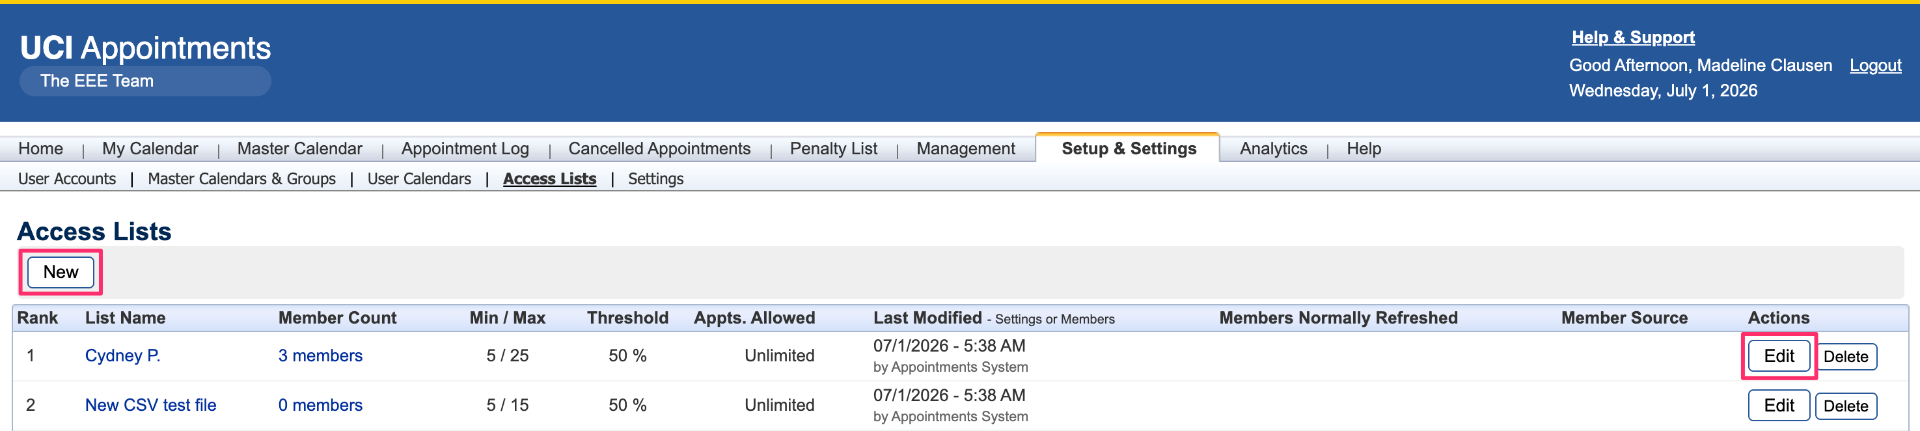
- Enter or edit the name and set your preferred settings:
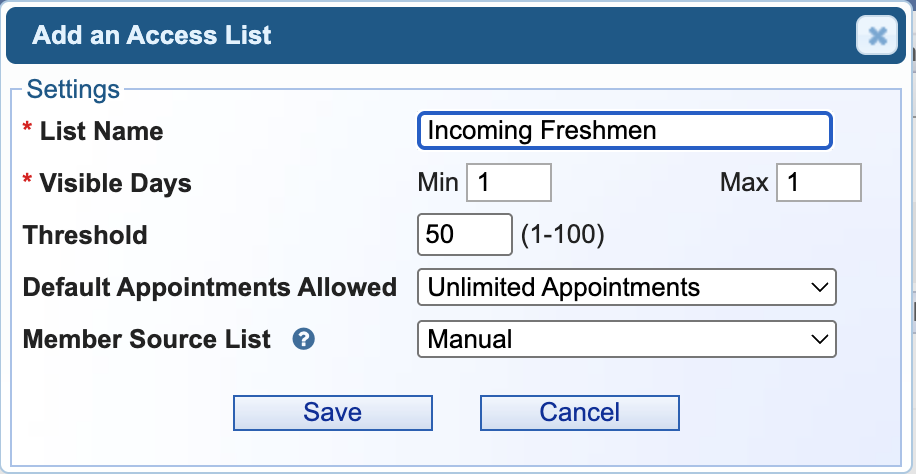
- Visible days: the minimum and maximum days visible for members of this access list to view availability on a calendar.
- Threshold percentage: is the percentage of appointments that must be full before showing more than the minimum number of visible days (the default is set to 50%).
- Default Appointments Allowed: sets the number of appointments a student in this access list will be able to schedule.
- Note that this setting is for appointments for all time; the default is unlimited.
- If it is not unlimited, whenever a student schedules an appointment the value will decrease by 1. When it reaches 0, the student will no longer be able to schedule an appointment.
- Note that this setting is for appointments for all time; the default is unlimited.
- Member source list: allows you to define a student population that is automatically refreshed for you. The current options are Manual, All Users with a UCInetID, All Students, and Custom Criteria for Students.
- Press Save to save your changes.
Creating a Manual (Custom) Access List
Appointments also offer the option to make manual access lists to restrict self-booking with your office to specific students. These students can be added to the manual list in bulk via a CSV file or individually by searching. Manual access lists can be combined with other access lists (i.e., allow access to all math majors + these 10 students).
Preparing the CSV file
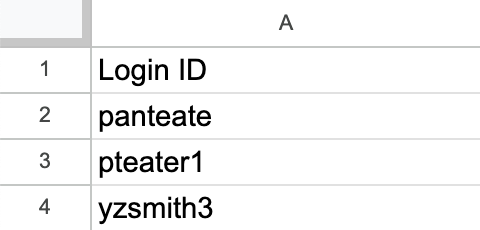
- The file should include a list of either Student IDs or UCInetIDs to add, one ID per line in the file.
- The file must contain a column header of either “Student ID” or “Login ID”, depending on which student identifier is entered.
- The supplied file must be saved in .csv (comma separated value) format.
Examples:
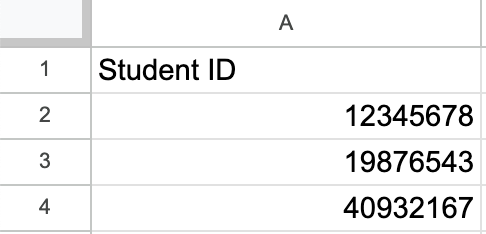
To create a manual access list
- Create a new access list using the steps mentioned above.
- For Member Source List, select Manual.
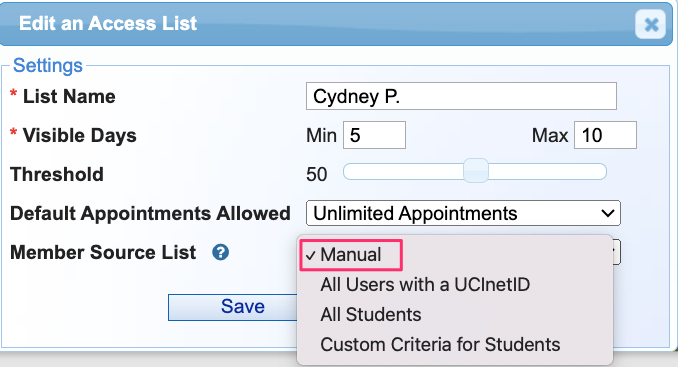
- Click Save.
- Click on “0 members” for that list.
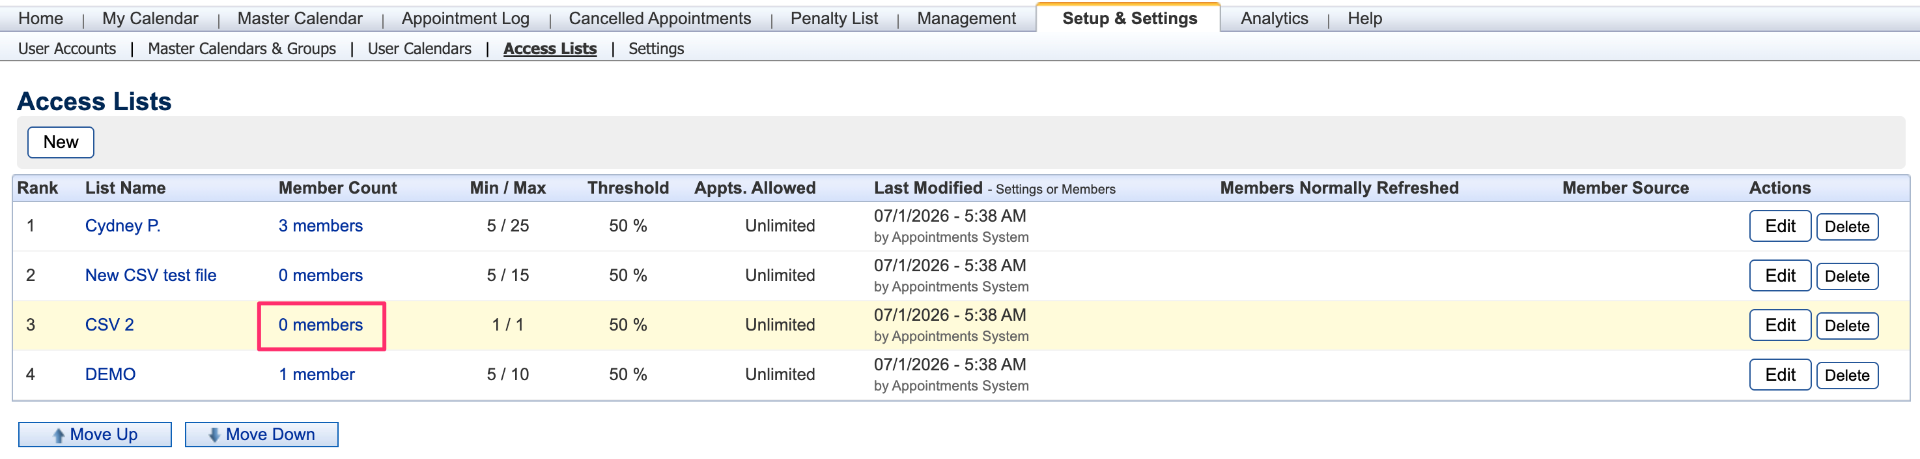
- Click Bulk Operations.
- For Action, select “Add list of members”.
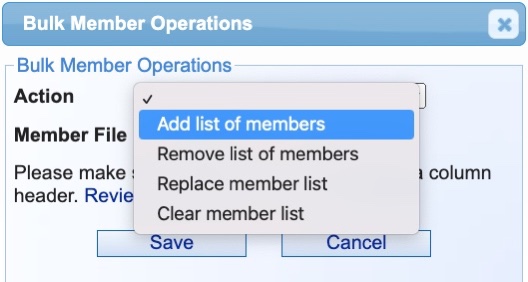
- Upload the CSV file you created.
- Click Save.
Note: You can also use the “Bulk Operations” button to clear the list, remove students listed in another file from this list, and more. Or you can add and remove individual students from the manual list.
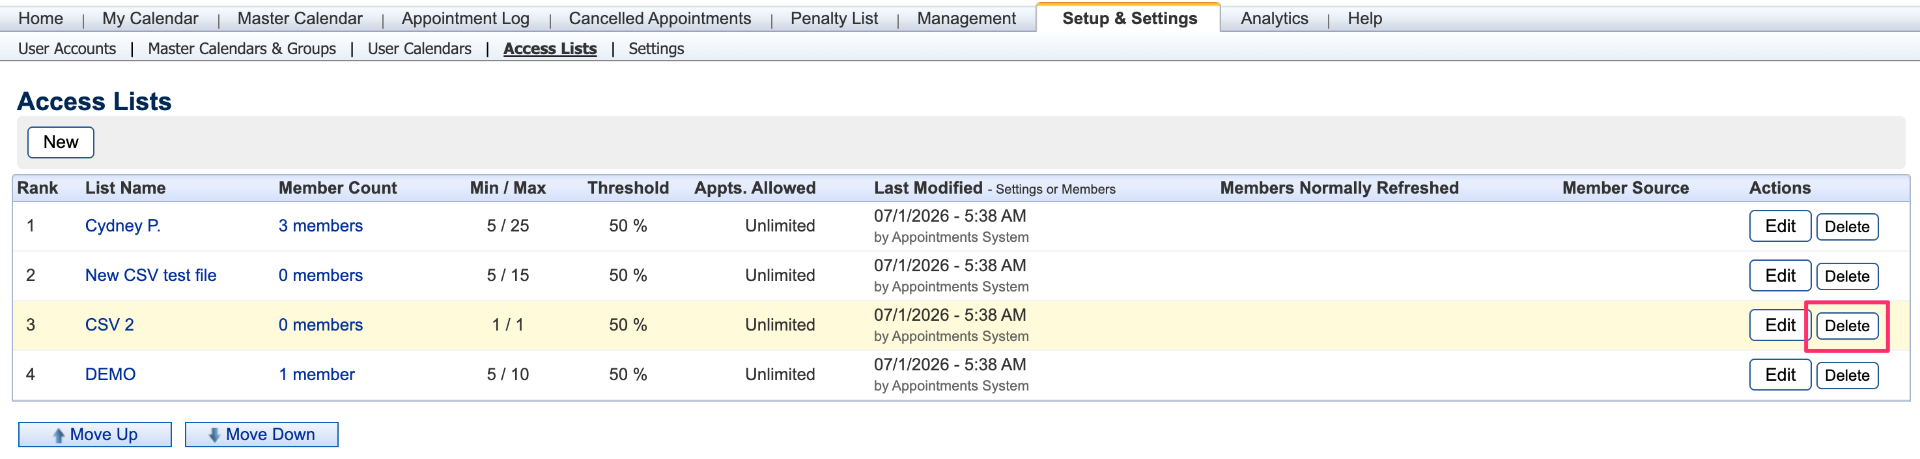
Deleting an Access List
Click Delete to delete an access list. The system will prompt you to confirm your action. Click OK to delete the access list. The rank of the other access lists will be automatically adjusted.
Settings
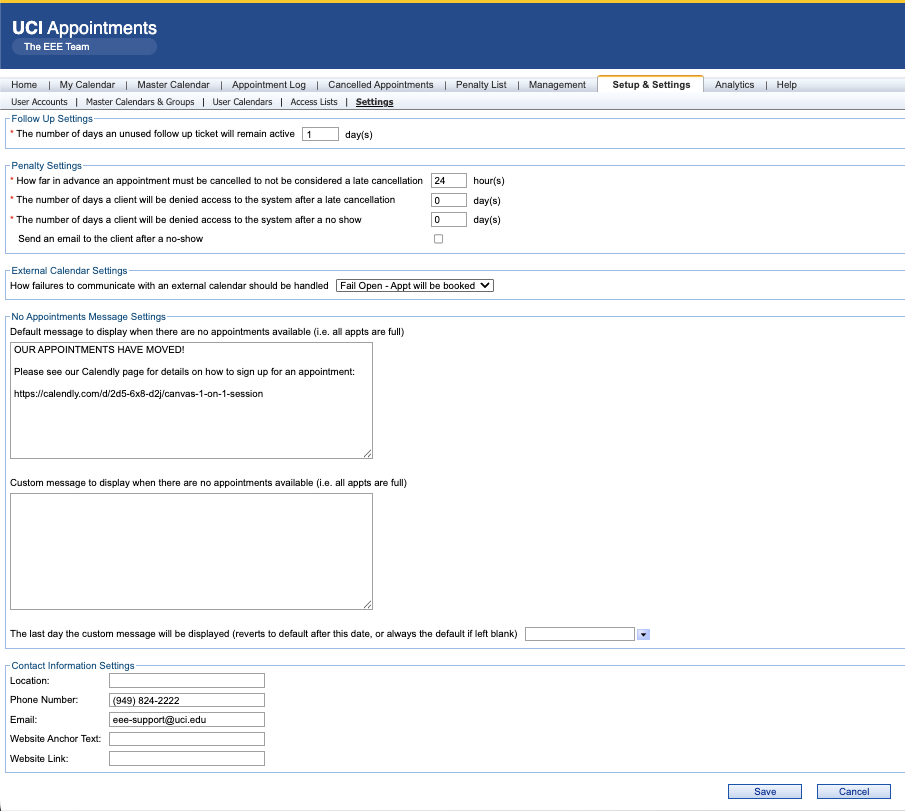
The Settings sub-tab is where a manager can adjust the system settings which apply to all master calendars within the Master Calendar Group.