Student Getting Started Guide
This help article provides information on how to navigate around UCI Appointments as a student.
Getting Started
- Upon going to UCI Appointments, students will be asked to select the office they would like to book an appointment with. Only offices that allow students to self-book appointments will be shown. If a student cannot book an appointment with the office, they will be shown a message indicating so.
- After selecting or typing the name of the office, a list of the groups within the office will be shown.
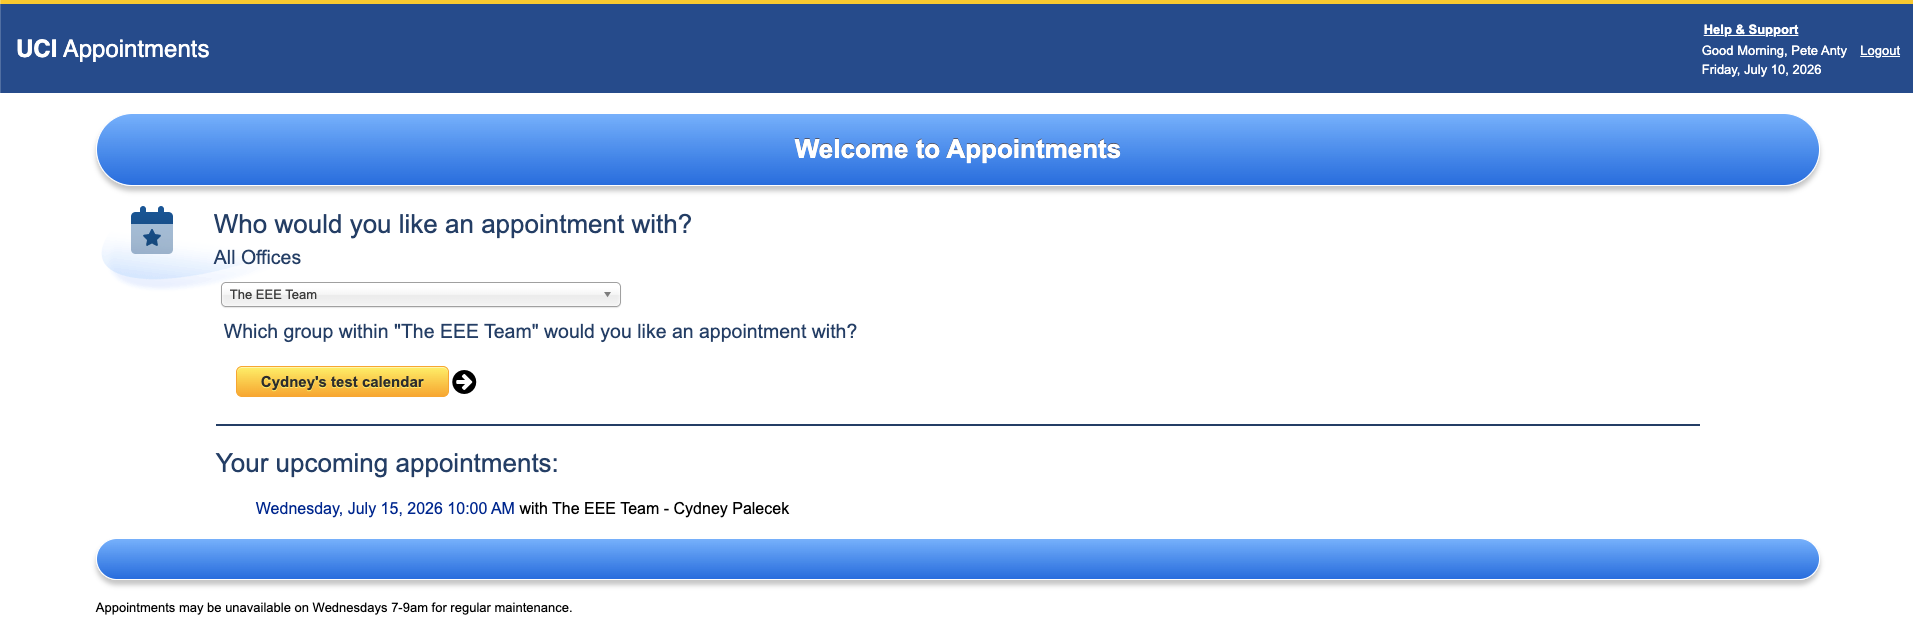
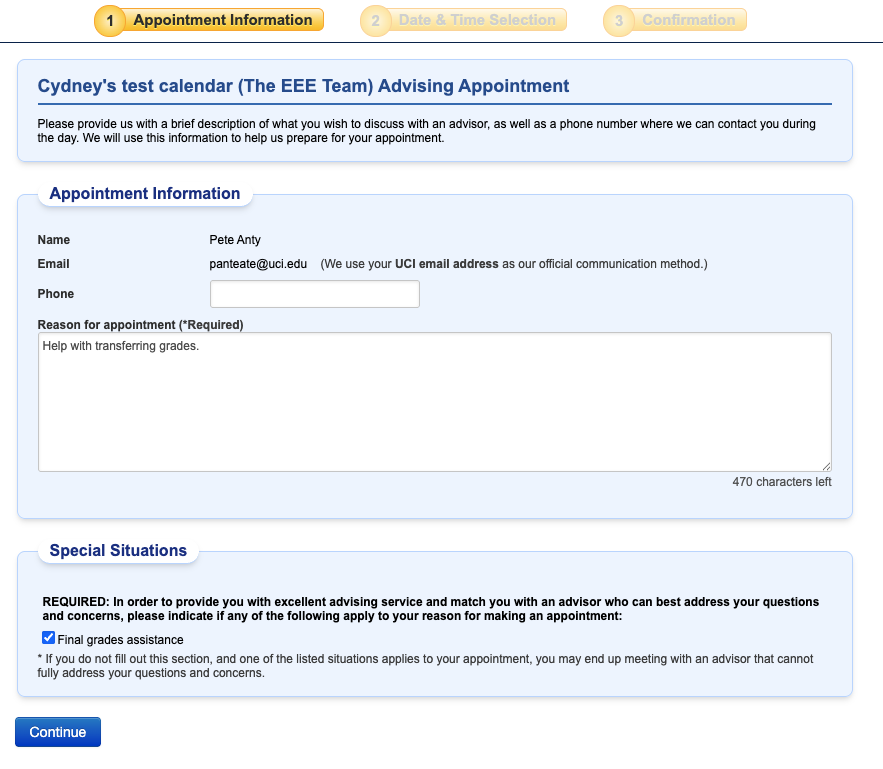
- After selecting the group, the appointment information screen will be shown. Fill out the relevant information and click Continue.
Note: Offices may require students to select one of the options under Special Situations before booking an appointment.
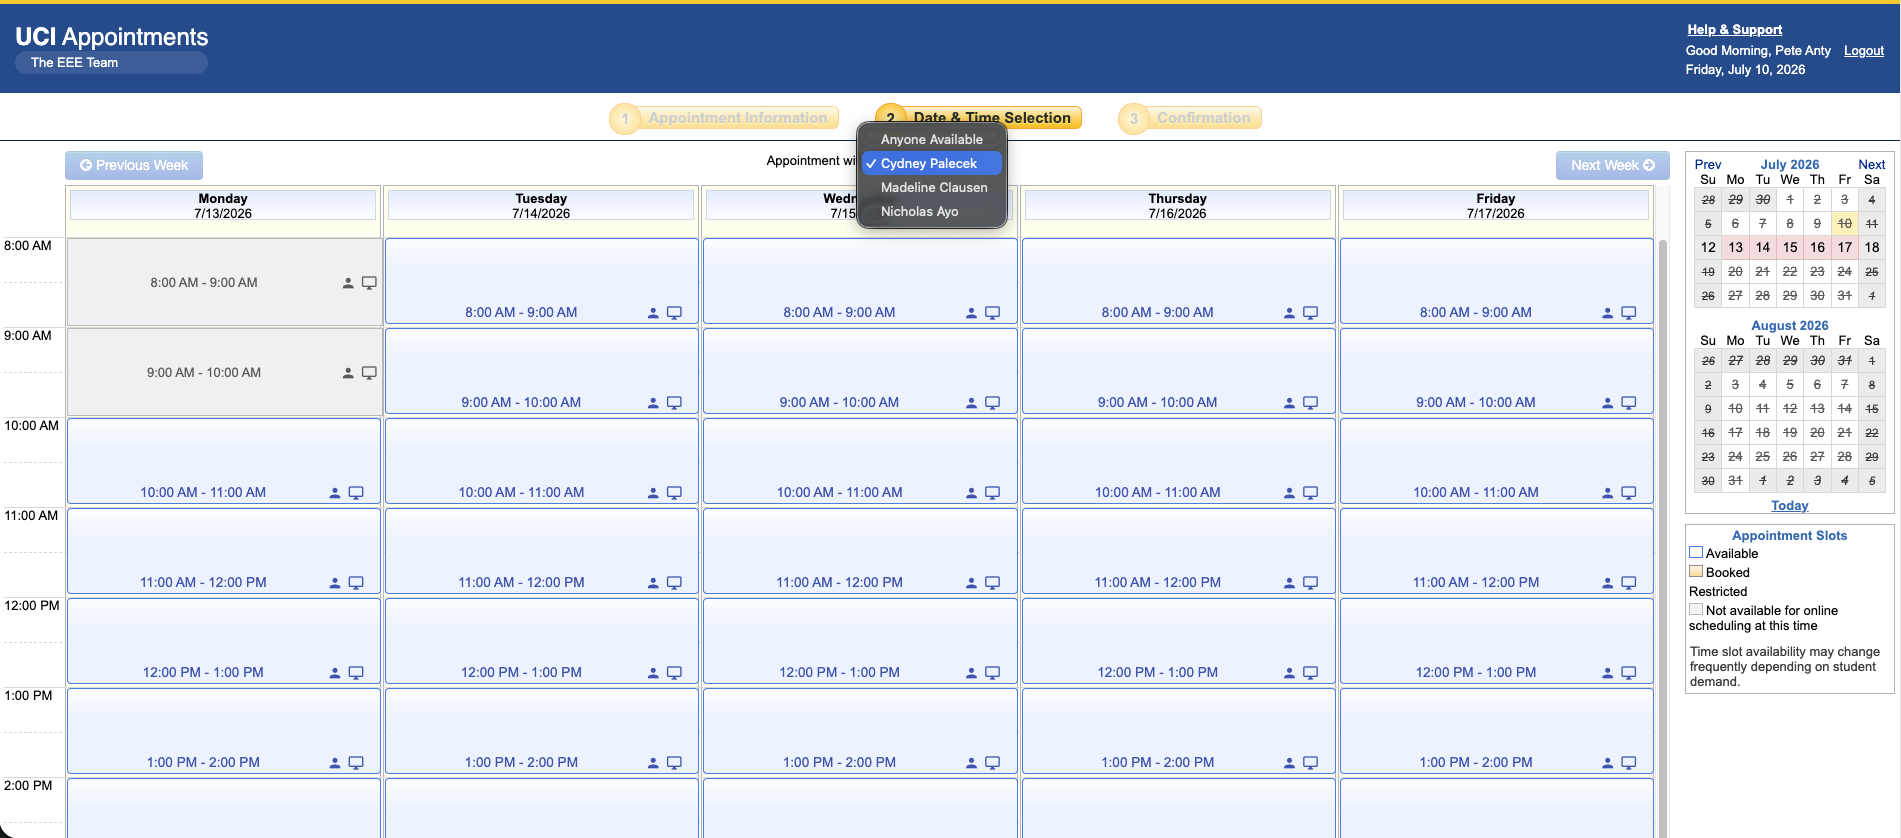
- Select an appointment slot. Click Anyone Available to see available appointment slots for an advisor you met with previously, or all advisors.
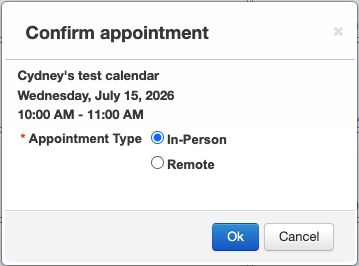
- After a slot is selected, a window will be displayed. Click Ok to book the appointment or Cancel to choose a different slot.
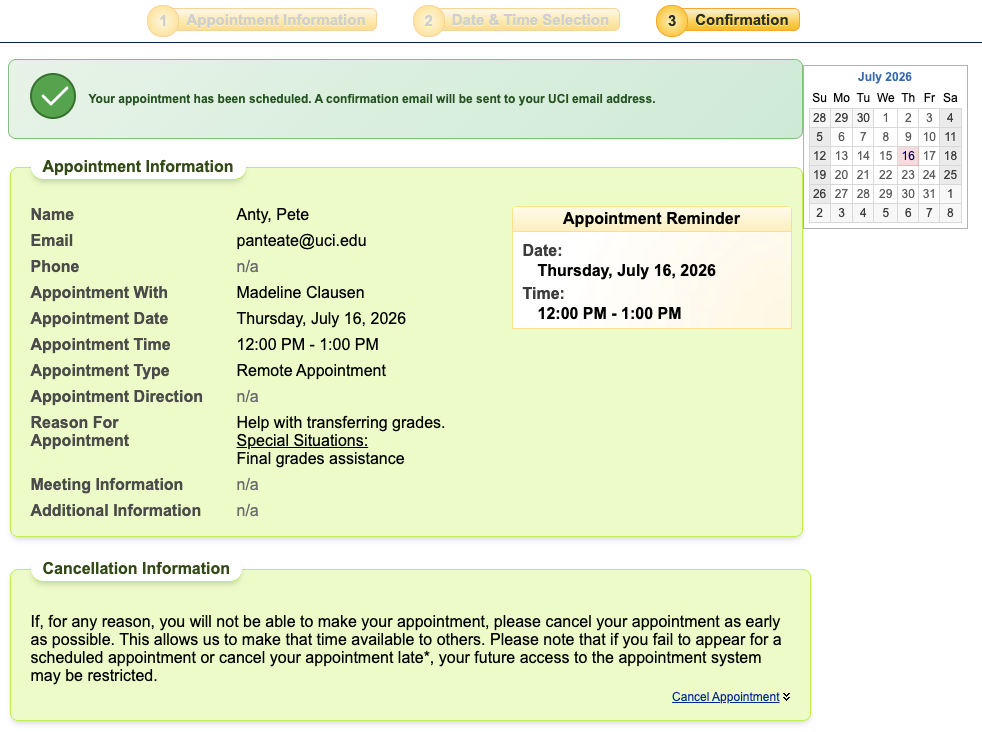
- The confirmation page shows your appointment information.
Self Check-in to Appointment
If the office has allowed students to self-check into their appointment, a Check in to appointment button will appear on the appointment confirmation page.
- Navigate to UCI Appointments and click Schedule & Manage My Appointments.
- Under the Your upcoming appointments section, select the appointment you wish to check-in to.
- Click the blue Check in to appointment button under the Check-In Information section.
- A pop-up will appear asking you to confirm your check-in. Click Check in.
- A message will appear under the Check-In Information section.
The following video walks through the steps mentioned above.
Canceling Appointments
- Navigate to UCI Appointments and click Schedule & Manage My Appointments.
- Under the Your upcoming appointments section, click the date of the appointment you would like to cancel.
- Click the Cancel Appointment link.
- Students must enter a reason for canceling the appointment.
Note: If this is a late cancellation, this warning is displayed to let the client know there will be a penalty. - Click the blue Cancel Appointmentbutton.
The following video walks through the steps mentioned above.
Common Errors
No Available Appointments
Suppose you’ve gotten to the page to select an appointment time but see a blank calendar with no appointment slots available. In that case, you likely have a follow-up ticket with an advisor you previously saw and will need to select a different advisor for that office. Depending on the office’s settings, you will either see a dropdown or two buttons. Regardless of which you see, there will be an option for Anyone Available, showing an aggregate of all advisors’ availability. If you select Anyone Available and still don’t see any available appointment slots, please reach out to the office you’re trying to visit because they may need to add additional availability.
Receiving a No-Show email
If the person you met forgot to check you into the system for your appointment, you may get an email saying that you were a no-show for your appointment. Using the information on the Office Contact Info page, reach out directly to the office where you made your appointment so that they can update their records.